
Nissan Maxima Owners Manual: Supplemental air bag warning light
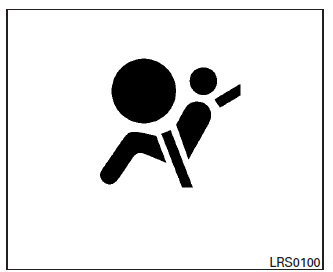
The supplemental air bag warning light,
displaying  in the instrument panel,
monitors
the circuits for the air bag systems, pretensioner(
s) and all related wiring.
in the instrument panel,
monitors
the circuits for the air bag systems, pretensioner(
s) and all related wiring.
When the ignition switch is placed in the ON position, the supplemental air bag warning light illuminates for about 7 seconds and then turns off. This means the system is operational.
If any of the following conditions occur, the front air bag, side air bag, curtain air bag and pretensioner systems need servicing:
- The supplemental air bag warning light remains on after approximately 7 seconds.
- The supplemental air bag warning light flashes intermittently.
- The supplemental air bag warning light does not come on at all.
Under these conditions, the front air bag, side air bag, curtain air bag or pretensioner systems may not operate properly. They must be checked and repaired. It is recommended that you visit a NISSAN dealer for this service.
WARNING
If the supplemental air bag warning light is on, it could mean that the front air bag, side air bag, curtain air bag and/or pretensioner systems will not operate in an accident.
To help avoid injury to yourself or others, have your vehicle checked as soon as possible. It is recommended that you visit a NISSAN dealer for this service.
Repair and replacement procedure
The front air bags, side air bags, curtain air bags and pretensioner(s) are designed to inflate on a one-time-only basis. As a reminder, unless it is damaged, the supplemental air bag warning light remains illuminated after inflation has occurred.
These systems should be repaired and/or replaced as soon as possible. It is recommended that you visit a NISSAN dealer for this service.
When maintenance work is required on the vehicle, the front air bags, side air bags, curtain air bags, pretensioner(s) and related parts should be pointed out to the person performing the maintenance.
The ignition switch should always be placed in the LOCK position when working under the hood or inside the vehicle.
WARNING
- Once a front air bag, side air bag, or
curtain air bag has inflated, the air bag
module will not function again and
must be replaced. Additionally, the activated
pretensioner(s) must also be replaced.
The air bag module and pretensioner( s) should be replaced. It is recommended that you visit a NISSAN dealer for this service. However, the air bag module and pretensioner(s) cannot be repaired.
- The front air bag, side air bag, curtain air bag systems and the pretensioner system should be inspected if there is any damage to the front end or side portion of the vehicle. It is recommended that you visit a NISSAN dealer for this service.
- If you need to dispose of the supplemental air bag or pretensioner systems or scrap the vehicle, it is recommended that you contact a NISSAN dealer for this service. Incorrect disposal procedures could cause personal injury.
- If there is an impact to your vehicle from any direction, your Occupant Classification Sensor (OCS) should be checked to verify it is still functioning correctly. It is recommended that you visit a NISSAN dealer for this service. The OCS should be checked even if no air bags deploy as a result of the impact. Failure to verify proper OCS function may result in an improper air bag deployment resulting in injury or death.
 Supplemental air bag warning labels
Warning labels about the supplemental frontimpact
air bag system are placed in the vehicle as
shown in the illustration.
WARNING
Do not use a rear-facing child restraint on
a seat protected by an ...

Other materials:
Electrical units location
Electrical Units Location
ENGINE COMPARTMENT
PASSENGER COMPARTMENT
LUGGAGE COMPARTMENT
...
Audio display unit
Removal and Installation
Audio display unit bracket
Audio display unit
Cluster lid D
Multifunction switch
Audio display unit bracket screws
Audio display unit screws
Metal Clip
REMOVAL
Remove the cluster lid D. Refer to IP-11, "Removal and
Installation".
Remov ...
Bluetooth control unit
Removal and Installation
REMOVAL
Disconnect the battery negative terminal. Refer to PG-67, "Removal
and Installation (Battery)".
Remove the trunk upper finisher. Refer to INT-36, "Exploded View".
Remove the parcel shelf finisher. Refer to INT-28, "Removal and
...
Nissan Maxima Owners Manual
- Illustrated table of contents
- Safety-Seats, seat belts and supplemental restraint system
- Instruments and controls
- Pre-driving checks and adjustments
- Monitor, climate, audio, phone and voice recognition systems
- Starting and driving
- In case of emergency
- Appearance and care
- Do-it-yourself
- Maintenance and schedules
- Technical and consumer information
Nissan Maxima Service and Repair Manual

0.0068