Nissan Maxima Service and Repair Manual: Side curtain air bag module
Component
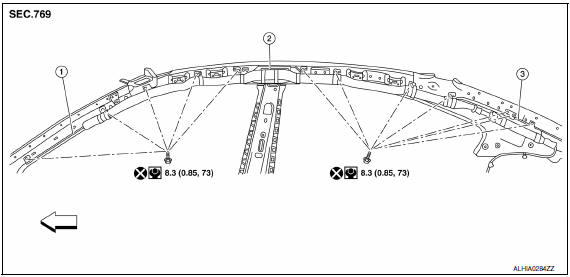
- Side curtain air bag module tether
- Side curtain air bag module assembly
- Side curtain air bag module inflator
 Front
Front
Removal and Installation
CAUTION:
- Before servicing, turn ignition switch OFF, disconnect both battery terminals and wait at least 3 minutes.
- Do not use air tools or electric tools for servicing.
- Always work from the side of air bag module. Do not work from the front of it.
- Always place the curtain air bag module with air bag deployment side facing upward.
- - Do not attempt to disassemble side curtain air bag module.
REMOVAL
- Disconnect the negative and positive battery terminals, then wait at least 3 minutes. Refer to PG-67, "Removal and Installation (Battery)".
- Remove the headlining. Refer to INT-33, "Removal and Installation".
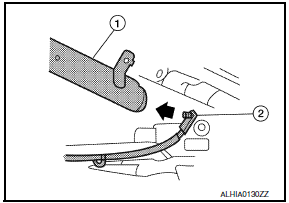
- Disconnect the side curtain air bag module harness connector (2) from the inflator (1).
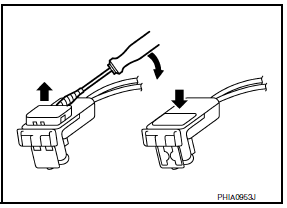
- For installing/removing direct-connect SRS harness connectors.
Refer to SRC-9, "SRS Component Connectors".
- Do not repair direct-connect SRS component harness connectors.
Refer to SRC-12, "Trouble Diagnosis Introduction".
- Remove the bolts, then remove side curtain air bag module assembly.
INSTALLATION
Installation is in the reverse order of removal.
CAUTION:
- Be careful not to damage the air bag harness.
- After the work is completed, make sure no system malfunction is detected by air bag warning lamp.
- In case a malfunction is detected by the air bag warning lamp, reset by the self-diagnosis function and delete the memory by CONSULT.
- If a malfunction is still detected after the above operation,
perform self-diagnosis to repair malfunctions.
Refer to SRC-12, "SRS Operation Check".
- Make sure the side curtain air bag module is not twisted at any point along the vehicle when installed.
- Replace the side curtain air bag module if it has been dropped or sustained an impact.
 Front passenger air bag module
Removal and Installation
CAUTION:
Before servicing, turn ignition switch OFF, disconnect both
battery terminals and wait at least 3 minutes.
Do not use air tools or electric tools for servic ...
 Side air bag module
Removal and Installation
SEAT ASSEMBLY WITH SIDE AIR BAG MODULE
Seatback board
Seatback assembly
Seatback frame
Side air bag module
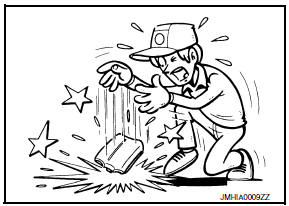
WARNING: Do not leave any objects
(screwdriver ...
Other materials:
P0615 starter relay
Description
TCM controls starter relay in IPDM E/R.
TCM switches starter relay ON at "P" or "N" position and allows to
crank engine.
Then it prohibits cranking other than at "P" or "N" position.
DTC Logic
DTC DETECTION LOGIC
DTC CONFIRMATION PROCEDURE
CAUTION: Al ...
Vehicle recovery (freeing a stuck vehicle)
WARNING
To avoid vehicle damage, serious personal
injury or death when recovering a stuck
vehicle:
Contact a professional towing service
to recover the vehicle if you have any
questions regarding the recovery
procedure.
Tow chains or cables must be attached
only to main structural m ...
Warning lights
For additional information on warnings and indicators,
refer to "Vehicle information display" in
this section.
Anti-lock Braking
System (ABS)
warning light
When the ignition switch is placed in the ON
position, the ABS warning light illuminates and
then turns off. This indicates the ABS is o ...
Nissan Maxima Owners Manual
- Illustrated table of contents
- Safety-Seats, seat belts and supplemental restraint system
- Instruments and controls
- Pre-driving checks and adjustments
- Monitor, climate, audio, phone and voice recognition systems
- Starting and driving
- In case of emergency
- Appearance and care
- Do-it-yourself
- Maintenance and schedules
- Technical and consumer information
Nissan Maxima Service and Repair Manual

0.0068